Showing posts with label vegetables. Show all posts

Wednesday, July 28, 2021

Recipes for a Cheapskate: Poppin' Peppers


Too many things to do this weekend to really get the dirt under my fingernails but I did get to harvest my jalapeño plant.


As the peppers were starting to turn bright red, that signaled that the time had come.

I got 13 peppers, just enough to make into a side dish for this week's barbecue.
So what can I do? Make mini jalapeño poppers.
Easy in concept but the smaller size of these peppers make a bit hard to stuff.

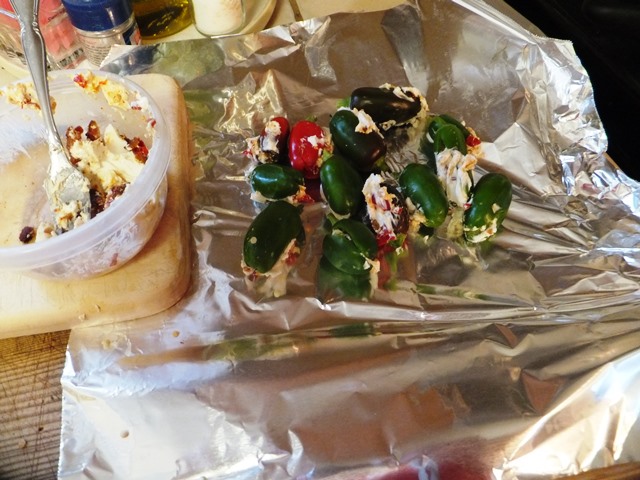
Each pepper is sliced on one side, propped open, and stuffed with my homemade mixture of cream cheese, chopped serrano peppers, and bacon.


I wrap them up in foil, poke a few holes in the top, and then put on the grill with our burgers.


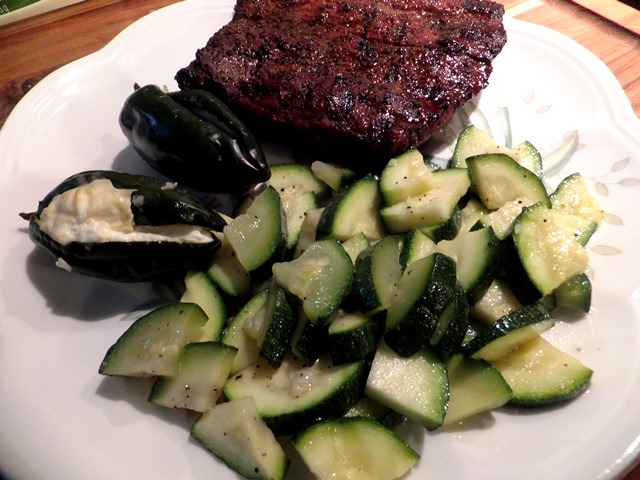
The finished product looks something like this.

Darryl
Copyright 2013 - Darryl Musick
All Rights Reserved

Tuesday, April 19, 2016

Spring Update


At the end of last summer, my lawn was a brown patch of drought parched straw.


Carefully watching the weather to maximize free water, overseeding with drought tolerant and heat tolerant grass, and adjusting the limited amount of water we're legally allowed to put on it...the lawn is making a bit of a comeback here in the middle of April.


The dandelion patrol has done some great things to limit those weeds but there's still quite a few mixed in with the grass but the war continues on that front.

I would be nice if my neighbors would take care of their weeds, too, since that's where the majority of the seeds come from.


I had my first session of deadheading the roses this weekend.


After, the front yard bushes look much cleaner.


Our first vegetable harvest were these onions with came from a recycled piece of an onion in the fridge (more on that later in the season).


I used them to make this delicious penne dish...


and this asparagus ham soup. You can find those recipes on our sister blog, Sunday Sauce.

Darryl
Copyright 2016 - Darryl Musick
All Rights Reserved

Thursday, April 14, 2016

BREAKFAST: Basic Omelet


Basically, an omelet is just a quickly fried, beaten egg, cooked without stirring (as you would with scrambled eggs), and folded over.  Most people also put something inside as a filling, such as cheese, vegetables, or meat.  

We're doing a little of all three in our basic omelet recipe.

INGREDIENTS (as shown, you can put whatever you like in your omelet)

2 eggs
1/4 teaspoon half and half
salt 
pepper
2 tablespoons shredded carrot
1 1/2 stalk of chopped asparagus
1/2 oz. shredded cheese 
1/2 oz. chopped ham
guacamole
1 tablespoon olive oil


In a hot non-stick ten inch frying pan, with some olive oil, put in the carrots and cook for a couple of minutes.  Add the asparagus and cook another five minutes. Set the mixture aside and wipe the pan clean with a towel. Be careful not to burn yourself.


Put the eggs in a bowl, add the half and half, and a sprinkle each of salt and pepper.


Stir the mixture with a fork. Add a little more olive oil to the pan and rock it back and forth to coat the cooking surface and put it on a hot flame.  Pour the mixture into the pan.


As the eggs start to solidify, lift the edges with a spatula and let the liquid mixture fill in the voids.


Put your filling...the carrot/asparagus mixture, cheese, and ham...over one half of the pan.


Reach over to the far edge and carefully put your spatula under the edge. Fold it over the other half. Press down on the top for about 10-15 seconds with your spatula and flip the omelet. Cook another 10 seconds and put on a plate.  I'm also garnishing mine with a little guacamole on top (picture at the top of the post).


These are also good to go, we're taking these two to my convalescing mother in law and her son. Just reheat them for a minute in the microwave and they're ready to eat.

Darryl
Copyright 2016 - Darryl Musick
All Rights Reserved

Monday, April 4, 2016

New Transplants to the Neighborhood

Picture by Letty Musick
Copyright 2016 - All Rights Reserved

Our seedlings have been living the plush, comfortable life in a tray in our family room window.  Sorry kids, out you go...


It's time to show these youngsters the way outside where they will now have to sink or swim in the cold, cruel world.

Actually, it's pretty warm now that spring is here and we've made a nice, comfortable, and nutritional bed for them with our tilling.


The little peat pockets I've started them in snap right off of the tray.


Next, a small hole is just right for that little peat pot.  The plant stays in it as the whole thing is put in the ground so no transplant shock and the peat serves as food for the plant.


Time to water in.


Some plants, like the tomatoes and this canteloupe, need some protection from predators so I put this wire basket around them to keep the bad guys at bay.


Now, they're all part of the garden. Let's get ready for the harvest later.

Darryl
Copyright 2016 - Darryl Musick
All Rights Reserved

Thursday, March 3, 2016

...and Away We Go!


Time to plant the seeds for this year's vegetable garden. My son helped me pick out this year's crop and we're going start them in this biodegradable seed tray.


We'll make a thumb print and a hole in each one and put in two seeds.


Two types of corn, bell peppers, broccoli, tomatoes, squash, and Tuscan melon...just because I've never been successful with sweet melons before.


Water them in...


...and wait for them to sprout.

Darryl
Copyright 2016 - Darryl Musick
All Rights Reserved

Thursday, February 11, 2016

SUPER SIDES: Garlicky Asparagus and Mushrooms


Another very easy and tasty side dish using our standard method of grilling vegetables on the barbecue.

I was inspired to do this mixup by a stand at one of our local farmer's markets that fried mushrooms in garlic. They're delicious and the aroma just draws you in. Deep fried mushrooms are not the healthiest thing, though.

This dish is and it's just as tasty.


INGREDIENTS

4 or 5 spears of asparagus
1/2 cup sliced, fresh mushrooms
2 teaspoons minced garlic
1 teaspoon olive oil
1/4 teaspoon Kosher salt
1/2 teaspoon black pepper

Slice up asparagus into 1" pieces. Place asparagus, mushrooms, salt, and pepper into a plastic bag. Hold the top closed and shake up vigorously. Add the garlic and shake again. Add the olive oil and shake again.


Place the resulting mixture on a sheet of foil paper. Close up, grill on the barbecue for 20 minutes.

Darryl
Copyright 2016 - Darryl Musick
All Rights Reserved

Monday, October 19, 2015

The Rock of Side Dishes


Probably 3 out of 4 Sunday dinners around here are on the barbecue.  The main dish isn't usually too hard. Think Flintsone. Fred Flintsone. Meat...fire...sear...good.

The problem comes with the others say "what'll we have on the side?"

What? A grilled hunk of meat isn't enough?

Alright, let me see what I can do...

OK, this is my go-to side dish and cooking method for sides on the grill. It's easy. It's cheap. It's delicious.

While I use a zucchini in the recipe below, you can use any soft vegetable like broccoli, squash, asparagus, etc. Hard vegetables like carrots and potatoes would take a much longer cooking period.

Ready?


INGREDIENTS

1 large zucchini (or a vegetable of your choosing) for three people, scale up as needed for more

1/4 teaspoon kosher salt

1/2 teaspoon black pepper

1/2 tablespoon olive oil


Slice up the vegetable in quarter inch slices.


Stack them like poker chips and cut in half.

Slice again so they're quartered.


Put in a leak-proof plastic bag (I save old bread bags for this purpose). Add the salt and pepper.  Twist the bag closed a shake well to distribute. Add the olive oil, twist and shake again.


Pour out onto a sheet of foil paper and seal the foil around the vegetables.


Grill with your entree on the barbecue over indirect heat. About 20 minutes, around the same time it takes to cook your steaks.

Darryl
Copyright 2015 - Darryl Musick
All Rights Reserved

Thursday, July 9, 2015

Caught in the Act!


Here are some of the deer that have been coming down from the nearby mountains to feed on my front yard rose garden. This one is helping itself to my nextdoor neighbor's holly topiary.

The drought is serious, folks.  These animals, and many more like them, are really feeling the brunt of it. They can have my roses until the rain returns.

Luckily, the bulk of my garden is behind a tall wall in the backyard, let's see how it's faring this week.


Tomatoes! I'm loving my tomato plants this year. Here, the hanging cherry tomatoes are reddening up. My son and I sampled but they're a bit tart at a redder color than this so we'll let them ripening for quite some time before harvesting. There are a ton of them on the basket.


That's in contrast to last year where I could count my entire tomato harvest on one hand. This hybrid is giving the cherry tomatoes a run in the numbers game and the big ones are the size of a baseball.


I was sweating a little over the heirloom plant but it's getting some nice fruit on it too, now.


In our citrus grove, we've got Myer lemons on the branches...


...more fruit on our Cara Cara orange...


...and a few late blooming Cara Cara flowers, too.


I had a micro-sprinkler clog and I think it affected our corn adversely. I replaced it but I don't know how this will do. In this drought-affected garden, however, it's sink or swim. We'll see if we can get anything edible out of it.


Darryl
Copyright 2015 - Darryl Musick
All Rights Reserved